Hello! Welcome to Fineshop Blog.
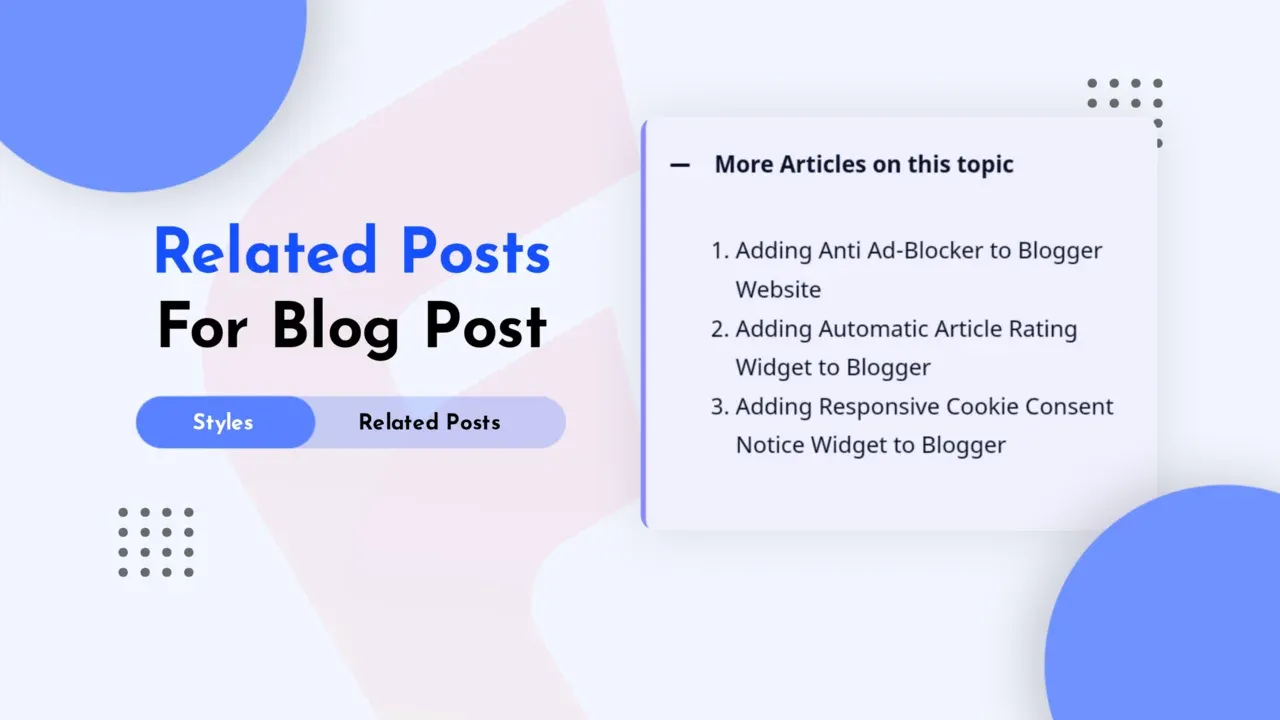
If you want to optimize your traffic and prompt your visitors to read more articles on your blog, adding Related Posts Accordion in the middle of your Blog Post will surely help you to achieve this.

Today, we will make a Stylish Related Posts Accordion that can be added anywhere in the middle of your Blogger Blog Posts. It will be helpful for your visitors because it will show a list of articles matching with what they are currently reading. As it will show related posts, so there will be more chances that the visitor will click on that related article.
How to Add Related Posts Accordion?
Adding Related Posts Accordion in your Blog Post will not require much knowledge about HTML, CSS or JS because I have already designed it for you. What you need to do is to implement the codes at right place in your Blogger Theme XML and add the Related Posts Accordion HTML Codes in the middle of your posts.
Important!Before we start adding codes in XML, I will recommend you to take a Backup of your current theme. By chance if any problem occurs, you can restore it later.
- First of all Login to your Blogger Dashboard.
- On Blogger Dashboard, click Theme.
- Click the arrow down icon next to Customize button.
- Click Edit HTML, you will be redirected to editing page.
-
Now search the code
]]></b:skin>and paste the following CSS Codes just above to it.If your template has a dark mode feature, and if you want a different color when in dark mode, you can customise the codes as per your need. Each template can have a different dark mode class, so please adjust it, you can replace the marked class with your template dark mode class.
/* Accordion by Fineshop */ .acdn{position:relative;list-style:none;margin:30px 0;padding:0;font-size:14px;line-height:1.7em;font-family:inherit} .acdn .ac{width:100%;padding:20px 0 20px 15px;margin:10px 0;background:#f0f0ff;border-radius:10px;border-left:4px solid #8a8aff;box-shadow:0 5px 10px rgba(51,51,51,.1)} .acdn .ac:nth-child(4n + 1){background:#f0f0ff;border-left-color:#8a8aff} .acdn .ac:nth-child(4n + 2){background:#fff0f3;border-left-color:#ff8aa1} .acdn .ac:nth-child(4n + 3){background:#f0faff;border-left-color:#8ad8ff} .acdn .ac:nth-child(4n + 4){background:#fff7f0;border-left-color:#ffc08a} .acdn .cont{margin:0;padding-left:27px;padding-right:27px;position:relative;overflow:hidden;max-height:0;transition:all .3s ease;color:#08102b} .acdn .cont ul, .acdn .cont ol{padding-left:13px} .acdn .cont li{padding:0} .acdn .cont a{text-decoration:none;color:#08102b} .acdn .cont a:hover{text-decoration:underline} .acdn p:first-child{margin-top:0} .acdn p:last-child{margin-bottom:0} .acTtl{display:flex;align-items:center;font-weight:700;color:#08102b} .acTtl span{display:flex;flex-grow:1} .acTtl span:before{content:'';padding-left:15px} .acIcn{flex-shrink:0;display:flex;align-items:center;width:12px;height:12px;position:relative} .acIcn:before, .acIcn:after{content:'';display:block;width:100%;height:2px;border-radius:2px;background:#08102b} .acIcn:after{position:absolute;transform:rotate(90deg)} .acMn{display:none} .acMn:checked ~ .acTtl .acIcn:after{visibility:hidden;opacity:0} .acMn:checked ~ .cont{max-height:100vh;padding-top:15px;padding-bottom:8px} .darkMode .acdn .ac{background:#252526;border-left-color:#4c4c4e} .darkMode .acdn .cont, .darkMode .acdn .cont a, .darkMode .acTtl, .darkMode .acMn:checked ~ .acTtl{color:#fefefe} .darkMode .acTtl .acIcn:before, .darkMode .acTtl .acIcn:after, .darkMode .acMn:checked ~ .acTtl .acIcn:before, .darkMode .acMn:checked ~ .acTtl .acIcn:after{background:#fefefe} -
After doing so, search the code
</b:defaultmarkup>and paste the following Codes just above to it.<!--[ Automatic Related Posts Script by Fineshop ]--> <b:includable id='auto-relatedPost'> <script> var labelArray = [<b:if cond='data:post.labels'><b:loop values='data:post.labels' var='label'>"<data:label.name/>"<b:if cond='data:label.isLast != "true"'>,</b:if></b:loop></b:if>]; var autoRelatedConfig = { homePage: "<data:blog.homepageUrl.canonical/>", numPosts: 10, titleLength:"auto", newTabLink: false, callBack:function(){} } </script> <script>/*<![CDATA[*/ var autoRelatedIndex,showAutoRelated;null!=document.getElementById("autoRelatedPost")&&function(a,n){var e,u={homePage:"https://blog.fineshop.eu.org",numPosts:7,titleLength:"auto",containerId:"autoRelatedPost",newTabLink:!1,callBack:function(){}};for(e in autoRelatedConfig)u[e]=("undefined"==autoRelatedConfig[e]?u:autoRelatedConfig)[e];function l(e){var t=a.createElement("script");t.async="async",t.rel="preload",t.src=e,n.appendChild(t)}function c(e){var t,a,n=e.length;if(0===n)return!1;for(;--n;)t=Math.floor(Math.random()*(n+1)),a=e[n],e[n]=e[t],e[t]=a;return e}var o="object"==typeof labelArray&&0<labelArray.length?"/-/"+c(labelArray)[0]:"";autoRelatedIndex=function(e){var t=e.feed.openSearch$totalResults.$t-u.numPosts,e=(e=1,t=0<t?t:1,Math.floor(Math.random()*(t-e+1))+e);l(u.homePage.replace(/\/$/,"")+"/feeds/posts/summary"+o+"?alt=json-in-script&orderby=updated&start-index="+e+"&max-results="+u.numPosts+"&callback=showAutoRelated")},showAutoRelated=function(e){var t,a,n=document.getElementById(u.containerId),l=c(e.feed.entry),o="<ul>",r=u.newTabLink?' target="_blank"':"";if(n){for(var s=0;s<u.numPosts&&s!=l.length;s++){a=l[s].title.$t,a="auto"!==u.titleLength&&u.titleLength<a.length?a.substring(0,u.titleLength)+"…":a;for(var d=0,i=l[s].link.length;d<i;d++)t="alternate"==l[s].link[d].rel?l[s].link[d].href:"#";o+='<li><a href="'+t+'" '+r+"><span>"+a+"</span></a></li>"}n.innerHTML=o+="</ul>",u.callBack()}},l(u.homePage.replace(/\/$/,"")+"/feeds/posts/summary"+o+"?alt=json-in-script&orderby=updated&max-results=0&callback=autoRelatedIndex")}((window,document),document.getElementsByTagName("head")[0]); /*]]>*/</script> </b:includable>Change the marked parts
10: Maximum no. of related posts (eg. 15)auto: Maximum no. of title characters (eg. 30), leave it auto for full titlefalse: Replace withtrueif you want to open related posts in New Tabs -
Add the following Codes just below to
<data:post.body/>.<!--[ Automatic Related Posts by Fineshop ]--> <b:include cond='data:view.isPost' data='post' name='auto-relatedPost'/> - Save the changes by clicking on this icon
That's done! Now add the following HTML Codes in your Blog Posts wherever you want to show Related Posts Accordion.
<!--[ Related Posts Accordion by Fineshop ]-->
<div class='acdn'>
  <!--[ Related Posts ]-->
  <div class='ac'>
    <div class='acCont'>
      <input class='acMn' id='offrelPost' name='relatedposts-1' type='checkbox'/>
      <label class='acTtl' for='offrelPost'>
        <i class='acIcn'></i>

        <!--[ Related Posts Title ]-->
        <span>More Articles on this topic</span>
      </label>

      <!--[ Related Posts Content ]-->
      <div class='cont'>
        <div id='autoRelatedPost'></div>
      </div>
    </div>
  </div>
</div>
Related Posts are shown as per Posts' Labels.
Alternative Usage
You can use this as Accordion in your posts also, for that use the following HTML codes:
<!--[ Accordion by Fineshop ]-->
<div class='acdn'>
  <!--[ Accordion 1 ]-->
  <div class='ac'>
    <div class='acCont'>
      <input class='acMn' id='offaccor1' name='accordion-1' type='checkbox'/>
      <label class='acTtl' for='offaccor1'>
        <i class='acIcn'></i>

        <!--[ Accordion Title ]-->
        <span>Accordion_Title_1</span>
      </label>

      <!--[ Accordion Content ]-->
      <div class='cont'>
        <p>...</p>
      </div>
    </div>
  </div>

  <!--[ Accordion 2 ]-->
  <div class='ac'>
    <div class='acCont'>
      <input class='acMn' id='offaccor2' name='accordion-2' type='checkbox'/>
      <label class='acTtl' for='offaccor2'>
        <i class='acIcn'></i>

        <!--[ Accordion Title ]-->
        <span>Accordion_Title_2</span>
      </label>

      <!--[ Accordion Content ]-->
      <div class='cont'>
        <p>...</p>
      </div>
    </div>
  </div>

  <!--[ Accordion 3 ]-->
  <div class='ac'>
    <div class='acCont'>
      <input class='acMn' id='offaccor3' name='accordion-3' type='checkbox'/>
      <label class='acTtl' for='offaccor3'>
        <i class='acIcn'></i>

        <!--[ Accordion Title ]-->
        <span>Accordion_Title_3</span>
      </label>

      <!--[ Accordion Content ]-->
      <div class='cont'>
        <p>...</p>
      </div>
    </div>
  </div>

  <!--[ Accordion 4 ]-->
  <div class='ac'>
    <div class='acCont'>
      <input class='acMn' id='offaccor4' name='accordion-4' type='checkbox'/>
      <label class='acTtl' for='offaccor4'>
        <i class='acIcn'></i>

        <!--[ Accordion Title ]-->
        <span>Accordion_Title_4</span>
      </label>

      <!--[ Accordion Content ]-->
      <div class='cont'>
        <p>...</p>
      </div>
    </div>
  </div>
</div>
Demo
Want to see it working?
You can check Related Posts Accordion Style before you add it in your Blog Posts.
Let's have a look at it!
Conclusion
This is all about adding the Related Posts Accordion in Blogger Blog Posts. I hope you enjoy this article. Please do share this article. And if you are facing problem in any section or you have any question then ask us in comment box. Thank you!
Copyright (c):
fineshopdesign.com
