Hello! Welcome to Fineshop Blog.
As we know, most popular browsers have AdBlocker feature, which is used by many users nowadays.

|
| © Fineshop Blog | Anti AdBlocker for Blogger |
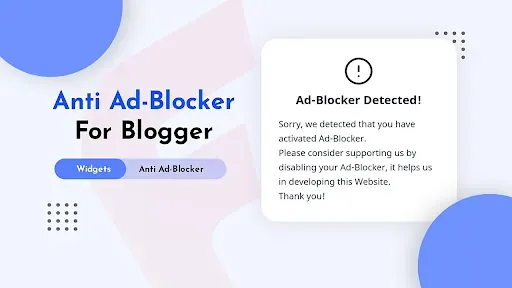
In this article, we are going to add Anti AdBlocker to any Blogger Website.
If it is not working for you, report to us with details like which browser you are using and its version, which DNS you are using (e.g. AdGuard, None), Operating System. We shall update the code for you.
Why is it Powerful?
It detects almost every browser inbuilt Ad-Blockers including Brave Browser's Shields, Ad-Blocking Extensions, Ad Blocking DNS, etc.
Last Tested on: 12th August, 2023 [Working]
Note that these Ad-Blockers may be updated in future to make it harder to detect, so if it is working today I can't ensure that it will also work in future.
How to add Anti AdBlocker?
Adding Anti AdBlocker to Blogger Website will not require much knowledge about HTML, CSS or JS because I have already designed it for you. What you need to do is to implement the codes at right place in your Blogger Theme XML.
Important!Before we start adding codes in XML, I will recommend you to take a Backup of your current theme. By chance if any problem occurs, you can restore it later.
Step 1: First of all Login to your Blogger Dashboard.
Step 2: On Blogger Dashboard, click Theme.
Step 3: Click the arrow down icon next to 'customize' button.
Step 4: Click Edit HTML, you will be redirected to editing page.
Step 5: Now search the code ]]></b:skin> and paste the following CSS Codes just above to it.
If your template has a dark mode feature, and if you want a different color when in dark mode, you can customise the codes as per your need. Each template can have a different dark mode class, so please adjust it, you can replace the marked class with your template dark mode class.
/* Pop-Up Box (Style 1) by Fineshop */
.popSc{position:fixed;z-index:99981;top:0;bottom:0;left:0;right:0;padding:20px;background:#f3f5fe;display:flex;justify-content:center;align-items:center}
.popSc.hidden{display:none}
.popSc .popBo{position:relative;background:#fff;max-width:400px;display:flex;justify-content:center;align-items:center;flex-direction:column;padding:30px;border-radius:30px}
.popSc .popBo svg{display:block;width:50px;height:50px;fill:none !important;stroke:#08102b;stroke-linecap:round;stroke-linejoin:round;stroke-width:1.5}
.popSc .popBo h2{margin:10px 0 15px 0;font-size:1.2rem;font-weight:800;color:#08102b}
.popSc .popBo p{margin:0;line-height:1.7em;font-size:0.9rem;color:#08102b}
.popSc .popBo .popBtn{display:inline-flex;justify-content:center;align-items:center;height:50px;width:50px;outline:none;border:none;background:#f3f5fe;border-radius:50%;margin-top:20px;transition:all .2s ease;-webkit-transition:all .2s ease}
.popSc .popBo .popBtn:hover{transform:scale(1.05);-webkit-transform:scale(1.05)}
.popSc .popBo .popBtn svg{width:24px;height:24px;flex-shrink:0;opacity:.8}
.popSc .popBo .popBtn svg.r{animation:rotateIcn 1.5s infinite linear;-webkit-animation:rotateIcn 1.5s infinite linear}
.darkMode .popSc, .darkMode .popSc .popBo .popBtn{background:#1f1f1f}
.darkMode .popSc .popBo{background:#2c2d31}
.darkMode .popSc .popBo svg{stroke:#fefefe}
.darkMode .popSc .popBo p, .darkMode .popSc .popBo  h2{color:#fefefe}
@keyframes rotateIcn{from{transform:rotate(0deg)} to{transform:rotate(359deg)}}
@-webkit-keyframes rotateIcn{from{-webkit-transform:rotate(0deg)} to{-webkit-transform:rotate(359deg)}}
Add the following CSS instead of adding CSS provided above to get an alternative look with Blur Effect.
/* Pop-Up Box (Style 2) by Fineshop */
.popSc{position:fixed;top:0;bottom:0;left:0;right:0;padding:20px;background:rgba(255, 255, 255, 0.1);z-index:99980;-webkit-backdrop-filter:blur(10px);backdrop-filter:blur(10px);display:flex;justify-content:center;align-items:center}
.popSc.hidden{display:none}
.popSc .popBo{position:relative;background:rgba(255, 255, 255, 0.8);-webkit-backdrop-filter:blur(10px);backdrop-filter:blur(10px);max-width:400px;display:flex;justify-content:center;align-items:center;flex-direction:column;padding:30px;border-radius:20px;box-shadow:0 5px 25px rgb(0 0 0 / 20%)}
.popSc .popBo svg{display:block;width:50px;height:50px;fill:none !important;stroke:#08102b;stroke-linecap:round;stroke-linejoin:round;stroke-width:1.5}
.popSc .popBo h2{margin:10px 0 15px 0;font-size:1.2rem;font-weight:800;color:#08102b}
.popSc .popBo p{margin:0;line-height:1.7em;font-size:0.9rem;color:#08102b}
.popSc .popBo .popBtn{display:inline-flex;justify-content:center;align-items:center;height:50px;width:50px;outline:none;border:none;background:#482dff;border-radius:50%;margin-top:20px;transition:all .2s ease;-webkit-transition:all .2s ease}
.popSc .popBo .popBtn:hover{transform:scale(1.05);-webkit-transform:scale(1.05)}
.popSc .popBo .popBtn svg{width:24px;height:24px;stroke:#fff;flex-shrink:0}
.popSc .popBo .popBtn svg.r{animation:rotateIcn 1.5s infinite linear;-webkit-animation:rotateIcn 1.5s infinite linear}
.popSc{animation:popupBlur .3s ease-in; -webkit-animation:popupBlur .3s}
.popSc >*{animation:popupScale .3s ease-in; -webkit-animation:popupScale .3s}
.darkMode .popSc{background:rgba(0, 0, 0, 0.1)}
.darkMode .popSc .popBo{background:rgba(50, 50, 50, 0.8)}
.darkMode .popSc .popBo svg{stroke:#fefefe}
.darkMode .popSc .popBo p, .darkMode .popSc .popBo h2{color:#fefefe}
@keyframes popupBlur {from{opacity:0}to{opacity:1}}
@-webkit-keyframes popupBlur{from{opacity:0}to{opacity:1}}
@keyframes popupScale{from{transform:scale(0);animation-timing-function:ease-in;opacity:0}to{transform:scale(1);opacity:1}}
@-webkit-keyframes popupScale{from{-webkit-transform:scale(0);-webkit-animation-timing-function: ease-in;opacity:0}to{-webkit-transform:scale(1);opacity:1}}
@keyframes rotateIcn{from{transform:rotate(0deg)} to{transform:rotate(359deg)}}
@-webkit-keyframes rotateIcn{from{-webkit-transform:rotate(0deg)} to{-webkit-transform:rotate(359deg)}}
Step 6: Now add the following Javascript just above to </head> tag. If you don't find it, it is probably already parsed which is </head>.
<script>/*<
*/
(function(){const n=document,o=n.head;var t="pointer-events: none; height: 1px; width: 0; opacity: 0; visibility: hidden; position: fixed; bottom: 0;";const a=n.createElement("div"),s=n.createElement("div"),d=n.createElement("ins");a.id="div-gpt-ad-3061307416813-0",a.style=t,s.className="textads banner-ads banner_ads ad-unit ad-zone ad-space adsbox ads",s.style=t,d.className="adsbygoogle",d.style="display: none;";const i={allowed:null,elements:[a,s,d]};this.checkAdsStatus=function(t){const e=n.body;"function"==typeof t&&("boolean"==typeof i.allowed?t(i):(e.appendChild(a),e.appendChild(s),e.appendChild(d),setTimeout(function(){if(0===a.offsetHeight||0===s.offsetHeight||d.firstElementChild)i.allowed=!1,t(i);else{const e=n.createElement("script");e.src="https://pagead2.googlesyndication.com/pagead/js/adsbygoogle.js",e.async=!0,e.crossOrigin="anonymous",e.onload=function(){i.allowed=!0,t(i)},e.onerror=function(){i.allowed=!1,t(i)},o.appendChild(e)}a.remove(),s.remove(),d.remove()},40)))}}).call(this);
function antiAdBlockerHandler() {
window.checkAdsStatus(function(ads) {
if (!ads.allowed) {
// Ads are Blocked
console.log("%c[ADS]", "color:#d32f2f;", "Blocked");
const icon = "<svg style='stroke:none;fill:currentColor!important' viewBox='0 0 24 24'><path d='M12.2 9L10.2 7H13C14.1 7 15 7.9 15 9V11.8L13 9.8V9H12.2M23 9V7H19C17.9 7 17 7.9 17 9V11C17 12.1 17.9 13 19 13H21V15H18.2L20.2 17H21C22.1 17 23 16.1 23 15V13C23 11.9 22.1 11 21 11H19V9H23M22.1 21.5L20.8 22.8L14.4 16.4C14.1 16.7 13.6 17 13 17H9V10.9L7 8.9V17H5V13H3V17H1V9C1 7.9 1.9 7 3 7H5.1L1.1 3L2.4 1.7L22.1 21.5M5 9H3V11H5V9M13 14.9L11 12.9V15H13V14.9Z'/></svg>";
const title = "Ad blocker detected!";
const message = "<p>We have detected that you are using adblocking plugin in your browser.<br/>The revenue we earn by the advertisements is used to manage this website, we request you to whitelist our website in your adblocking plugin.</p>";
// Lets create the popup
const element = document.createElement("div");
element.className = "popSc";
element.innerHTML = "<div class='popBo'>" + icon + "<h2>" + title + "</h2><div class='popCo'>" + message + "</div></div>"
document.body.appendChild(element);
} else {
// Ads are allowed;
console.log("%c[ADS]", "color:#43a047;", "Allowed");
}
});
document.removeEventListener("DOMContentLoaded", antiAdBlockerHandler);
};
if (document.readyState === "complete" || document.readyState !== "loading") {
antiAdBlockerHandler();
} else {
document.addEventListener("DOMContentLoaded", antiAdBlockerHandler);
}
/*]]>*/</script>Step 7: Lastly, Save the changes by clicking on this icon
That's done!
Conclusion
This is all about adding the Anti AdBlocker to Blogger Website. I hope you enjoy this article. Please do share this article. And if you are facing problem in any section or you have any question then ask us in comment box. Thank you!
© Copyright:
www.fineshopdesign.com